Creating Your Log
Location represents the geographical area where the drive took place. We recommend not using exact addresses since the IRS doesn’t require exact street address. They only specify “Location” – which can be far more general and then works very well for our service. For example, using “Los Angeles Metro Area” is acceptable as a location. You can see how this greatly simplifies the challenges of building a log.
From the Calendar view, you can view your logs and add, edit or delete logs by visiting the Log Management page. Click on the “DRIVING LOG” heading (just above the Vehicles icon on the left side of the screen) to view the Log Management page.
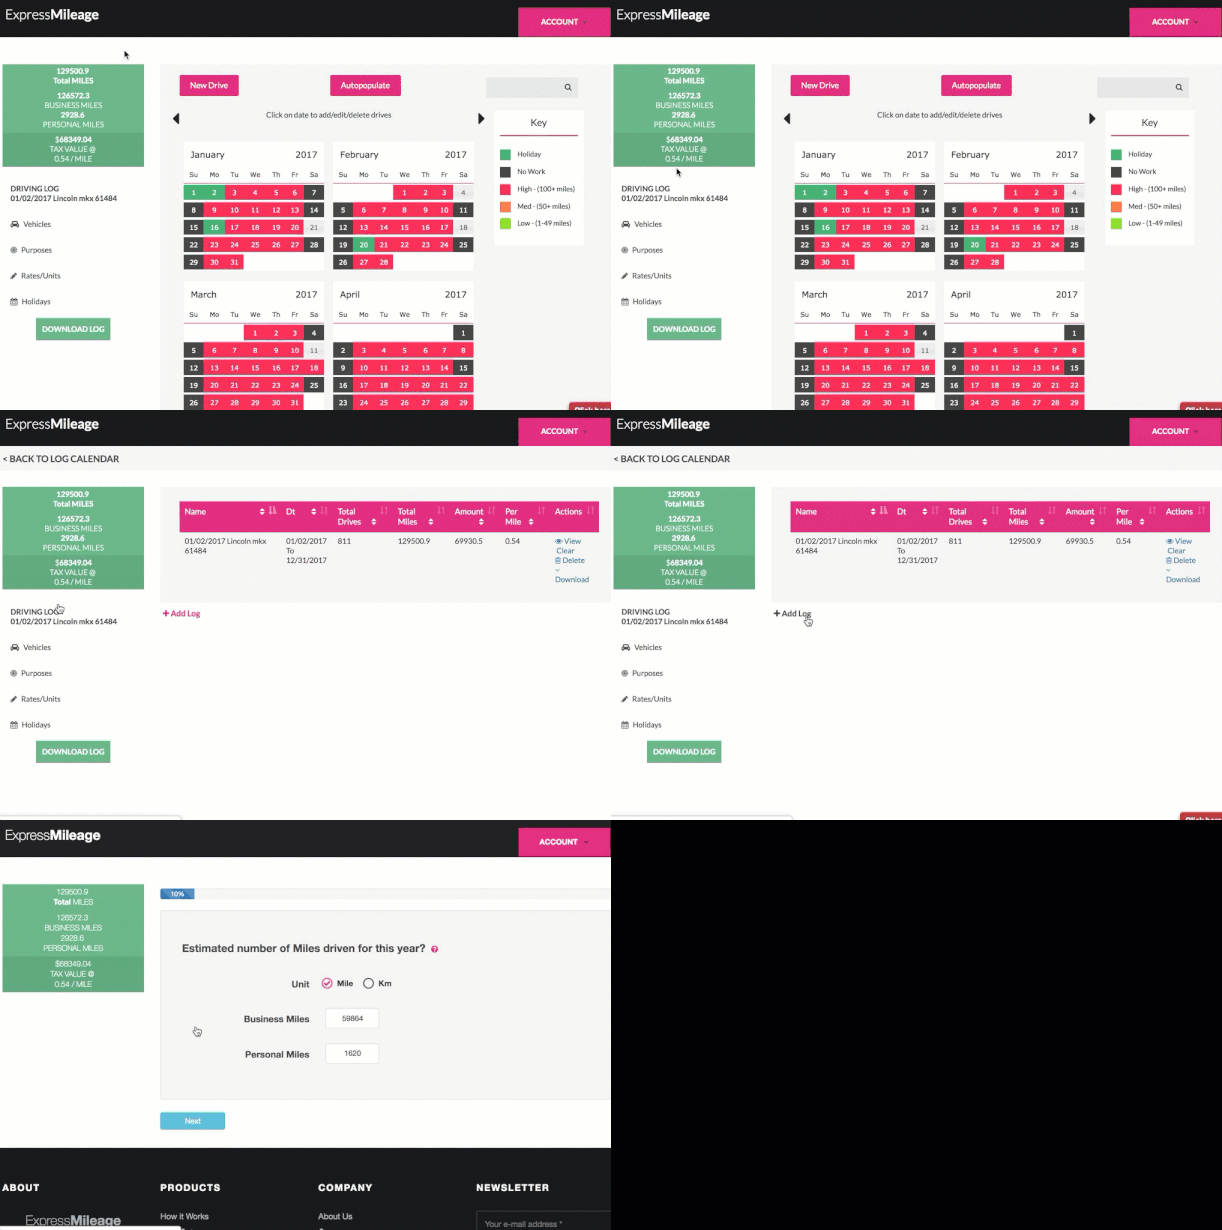
Management page, you can click “+Add Log” to create a new log. You may be prompted to upgrade your account – multiple logs are available for Elite members ONLY.
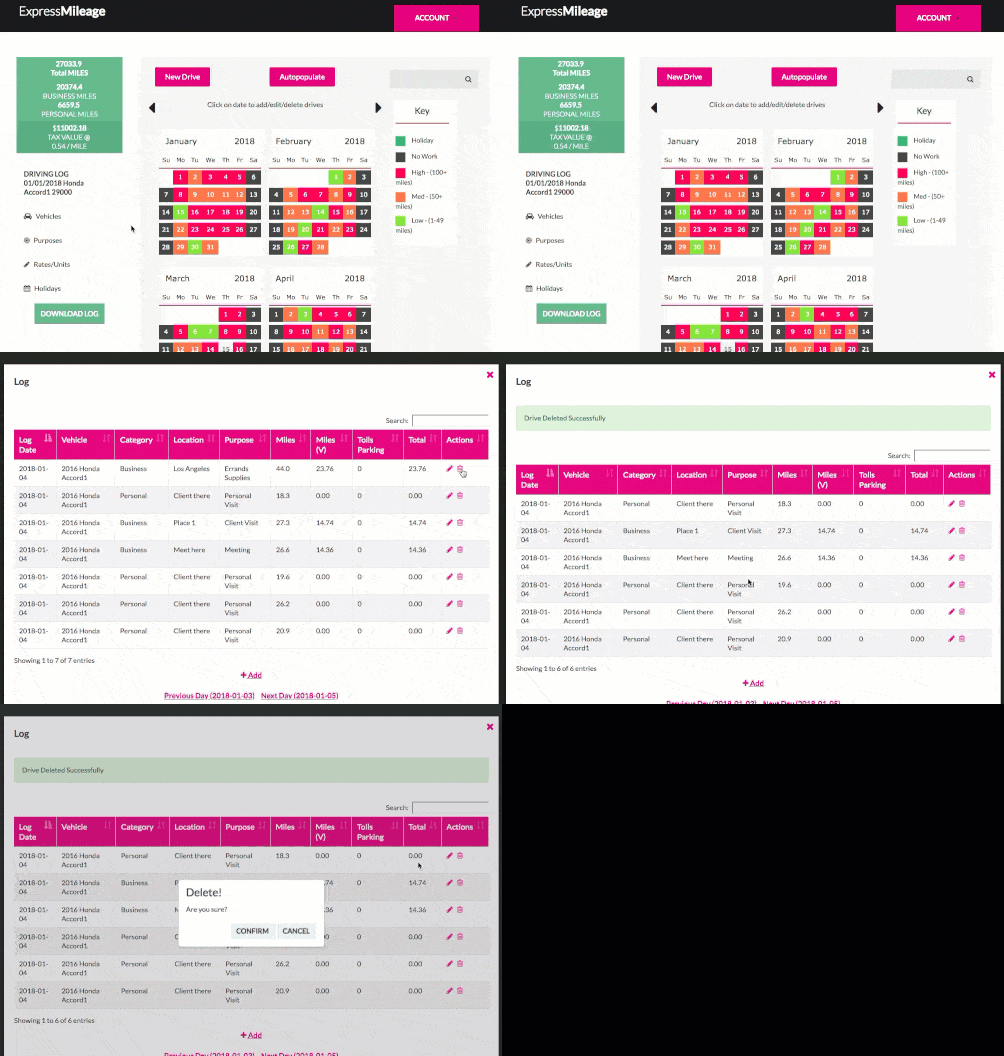
To delete drives from your log, click on any date on the calendar and then click the Trash icon next to the drive you want to remove.
You can also very quickly and easily remove unwanted drives from the downloaded spreadsheet simply by deleting rows within the spreadsheet. The log will automatically re-calculate odometer readings and totals when rows are deleted. Please do NOT delete the 1st drive entry – as it is the starting values for all formulas within the driving log.
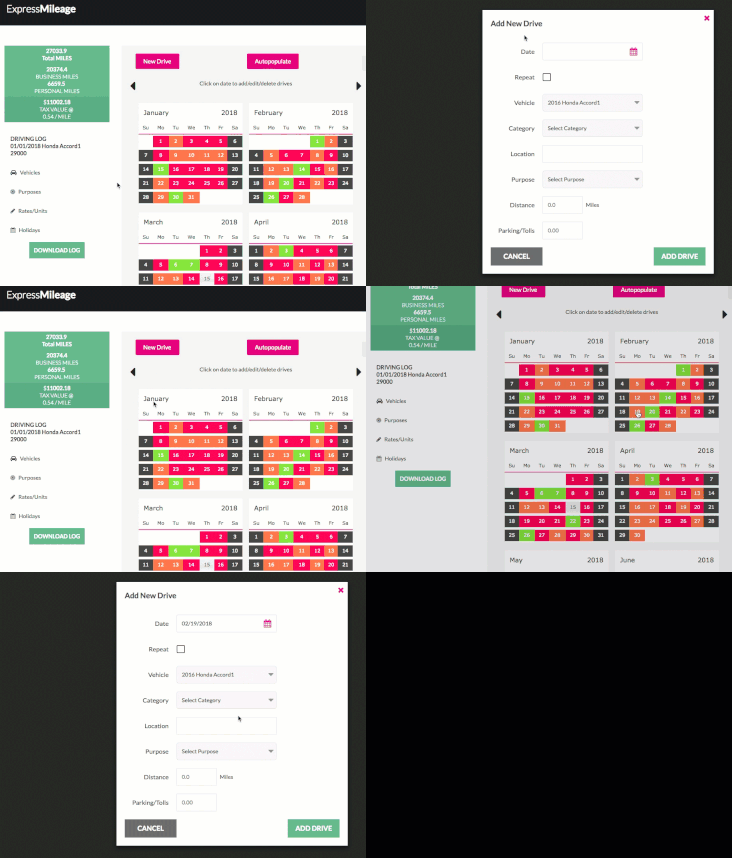
From the Calendar view, you can add drive entries to your log using the “New Drive” button. You can also add/edit/delete drive entries on your log by clicking on any date on the calendar and then clicking the “+ Add Drive” button.
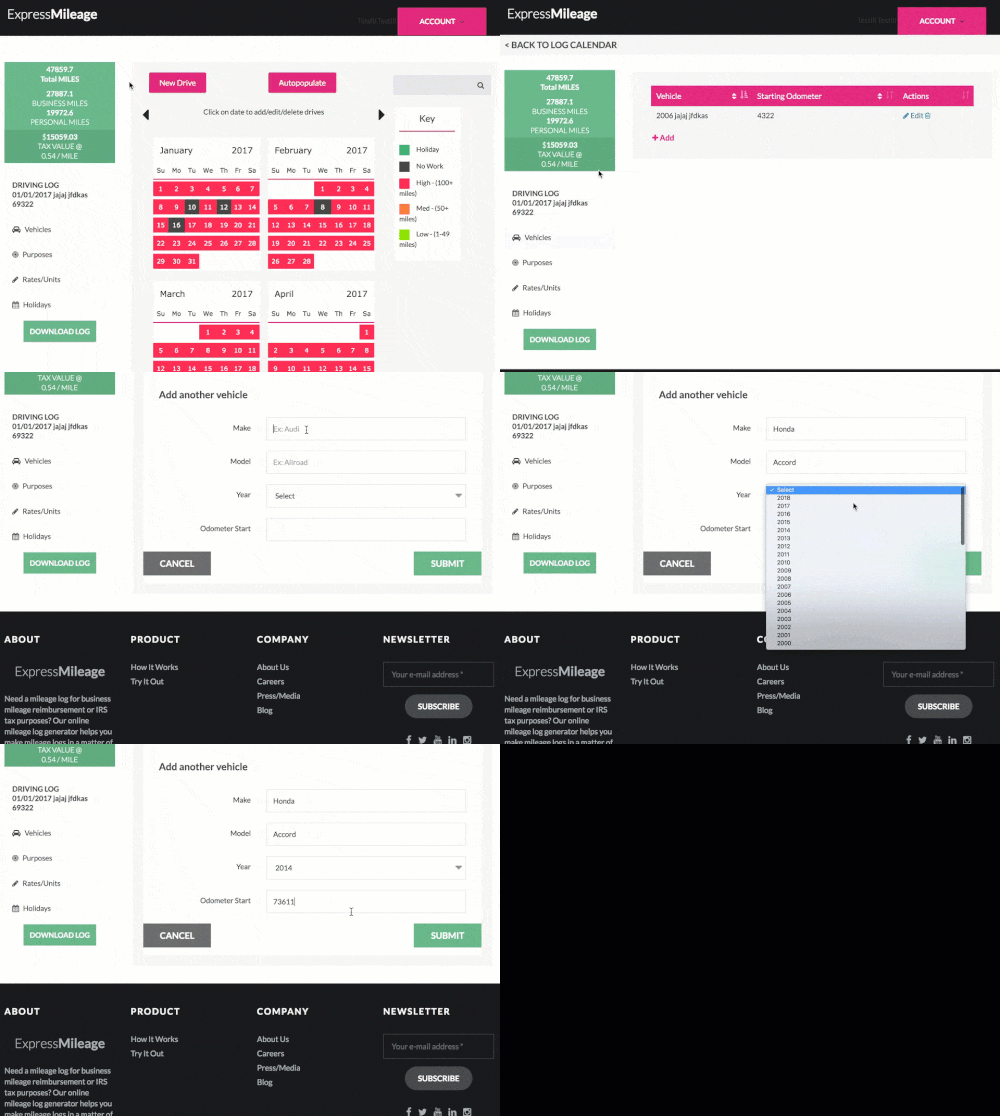
Yes. It is easy to create logs for multiple vehicles. We support tracking mileage for multiple vehicles throughout the year. We also support tracking these vehicles across multiple years.
To add / edit vehicles, visit the Vehicles page and manage your vehicles from there:
There are a few way to generate more random logs. The first is to set the Variance of the drive output ()- to make sure the values for each drive are slightly different. You can set the variance from the My Account -> Rates/Units page.
The second is to auto-populate multiple times to create a layering effect on the driving log. Each time you run autopopulate – it will append your log and create additional log entries. To start another round of autopopulating, simple visit the Basic Info link.
The third option is to create repeating events using the “New Drive” feature – and create a series of drives that will help create more randomness in your log. Click “Repeat” from the “New Drive” window and you will be given the opportunity to setup weekly or monthly repeating events.
Miles Value is the Miles (distance) X Cost Per Mile. It is also represented by Miles(V) within the system.
For example: 10 miles X .50 per mile = $5.00 Miles(V)
Note: You can adjust Cost Per Mile from the Rates-Units page.
Setting the Variance adjusts each drive by +/- percent. It is applied to each drive on the log on output (download).
For example: A 10 mile drive with 2% variance may fall between 9.8 and 10.2 miles.
You can update your Variance from your Account Settings page under Units/Rates.
Deleting a log removes both the log entries and the log container.
To Delete your log, go to the Driving Log Management page and click the Delete link next to the log name.
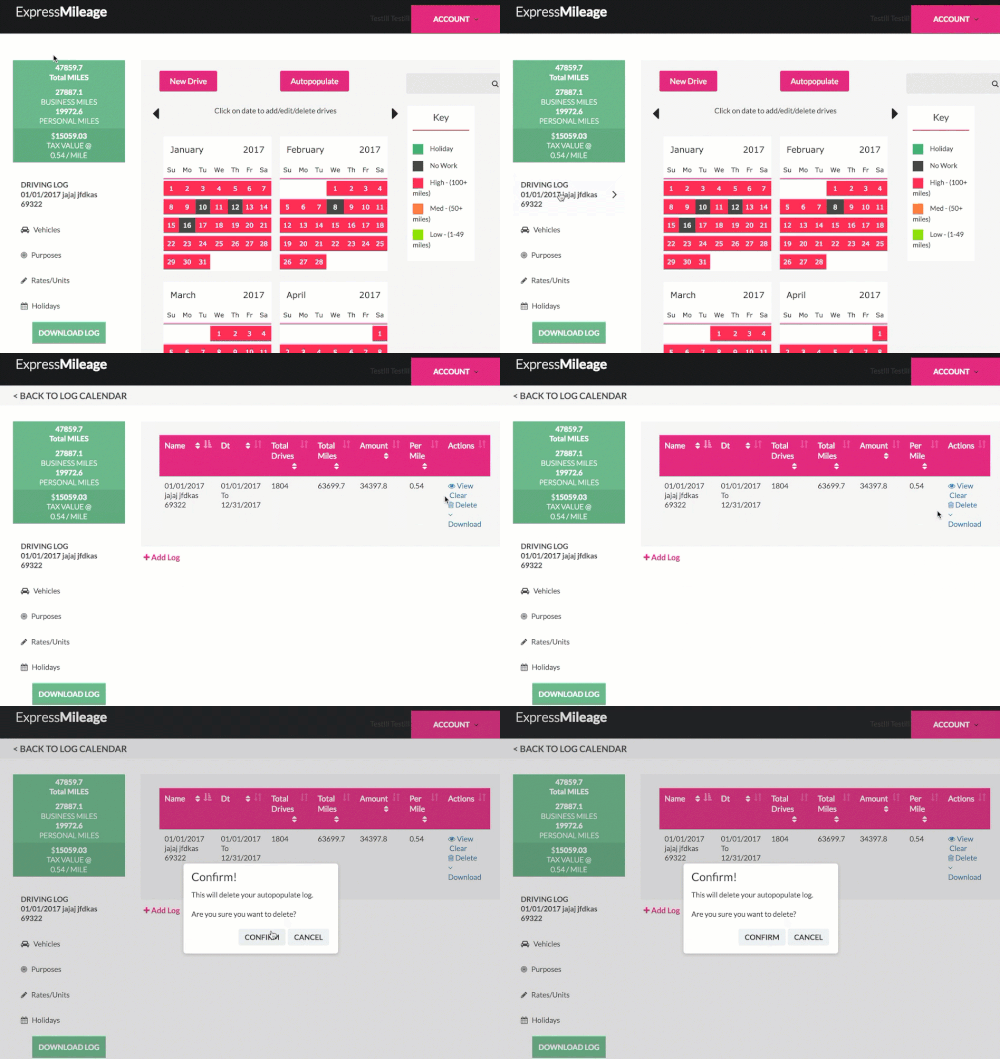
You can also Clear your log from the Driving Log Management page. Clearing a log removes all driving log entries but keeps the container (the log).
To change your odometer, just visit the “Vehicles” page and edit the starting Odometer for your vehicle. Be sure to hit SAVE after updating. When your log is downloaded, your new odometer reading will being on the first entry in your log.
